Abstracting away Vulkan and Dx3D12

What graphics API should I use? Is a question that many developers have asked themselves when starting a new project. The most obvious choice would be the better performing one, but when put to the test, we find out that they mostly perform the same (with some negligible variations). Then it should be the most compatible one, but what if the project is aimed for a single known platform? or what if a dev like the style of one API better? In short, the answer has always been It depends on what you plan to achieve.

However, with the arrival of the next generation of graphics APIs, I wanted to re-explore this question. The first thing I found out was that by reducing the driver overhead, it removed that black box feeling that came with the previous generation. And that by exposing what is really going on under the hood, we could see much more similarities between the APIs than before. I’ve concluded that this generation is much more suited for an abstraction layer that allows for one single renderer for multiple APIs.

Preparation:

The first step was to read as much content as I possibly could find on the subject, and look for some examples that could help me during the process. For Vulkan I used : vulkan-tutorial, raw-vulkan, ImGui’s example, and SaschaWillems’s repo. As for Dx3D12 I used : Microsoft’s samples, ImGui’s example, and shuhuai’s repo. The next step was to build a small demo of a triangle being displayed using a shader for both APIs, and benchmark it. Then I stripped all the rendering code from my previous engine down to the window rendering, and started drafting an architecture.

Architecture:

The goal was to keep the architecture as lightweight as possible, and figure out what concept should be made into classes to represent a fully scriptable pipeline. Here’s a very basic UML of the current state:

uml

Initially, I had a Mesh and a Framebuffer class, but the Mesh class was moved to the core part of the project since it basically just wraps two buffers (VBO/IBO). And the Framebuffer class was merged with the RenderPass class since their role are very similar.

Scripting:

For the scripting, I’m using luabind-deboostified built with LuaJIT. This allows the use of class and inheritance, and the manipulation of C data using the FFI extension. The first step is to create a window object, this is done in the script client.lua. Here’s the minimal code:

--[[
- @file client.lua
- @brief
]]

class 'client' (orb.Window)

function client:__init()
    orb.Window.__init(self, 1280, 720, "Engine", orb.Renderer.Vulkan)
end

instance = client()


A window is assumed to be a dynamic object, so the engine is taking care of calling the update function and providing the delta value between each frames. There’s two way a user can interact with the update call, either through connecting a signal to the window, or by overriding the update virtual. Both ways are shown here:

--[[
- @file client.lua
- @brief
]]

class 'client' (orb.Window)

function client:__init()
    orb.Window.__init(self, 1280, 720, "Engine", orb.Renderer.Vulkan)
    
    -- 1) signal connection
    self.on_update:connect(function(dt)
    
        -- a lambda is used to inline
        print("UPDATE 1")
    end)
end

-- 2) virtual overring
function client:__update(dt)

    print("UPDATE 2")

    -- call upper
    orb.Window.__update(self, dt)
end

instance = client()


Now to actually render something, a RenderPass object must be created first. In order to do so, the user must provide at least a shader, and preferably a camera. If a camera is not provided, the provided uniforms will be identity matrices. Once created, it’s possible to record Commands using the on_record signal.

--[[
- @file client.lua
- @brief
]]

class 'client' (orb.Window)

function client:__init()
    orb.Window.__init(self, 1280, 720, "Engine", orb.Renderer.Vulkan)
    
    -- create camera. fov in radians, ratio, nearZ, farZ
    self.camera_ = orb.Camera(math.radians(80.0), w/h, 0.1, 15000.0)
    self.camera_.position = vec3(0, 0, -5)
    
    -- create a cube mesh
    self.cube_ = orb.Mesh.build_cube(self.renderer, 1.0)
    
    -- create the render pass
    local pass = self.renderer:create_render_pass({
        shader = FileSystem:search("default.shader", true),
        camera = self.camera_,
        use_vertex_3d = true
    })
    
    -- record a command drawing a cube
    pass.on_record:connect(function(cmd)
        self.cube_:draw(cmd)
    end)
end

function client:__update(dt)

    -- finally, call display here
    self:display()
end

instance = client()


This is the content of the shader:

{
    "shaders" : [
    {
        "type" : "vs",
        "data" :
        "
            cbuffer CamUBO : register(b0)
            {
                float4x4 projMatrix;
                float4x4 viewMatrix;
                float4x4 viewProjMatrix;
            };

            struct VS_INPUT
            {
                float3 pos : POSITION;
                float2 tex : TEXCOORD;
            };

            struct VS_OUTPUT
            {
                float4 pos : SV_POSITION;
                float2 tex : TEXCOORD;
            };
            
            VS_OUTPUT main(VS_INPUT input)
            {
                VS_OUTPUT output;
                output.pos = mul(float4(input.pos, 1.0f), viewProjMatrix);
                output.tex = input.tex;
                return output;
            }
        "
    },
    {
        "type" : "fs",
        "data" :
        "    
            struct VS_OUTPUT
            {
                float4 pos : SV_POSITION;
                float2 tex : TEXCOORD;
            };
            
            struct GBuffer
            {
                float4 albedo : SV_Target0;
            };
            
            GBuffer main(VS_OUTPUT input)
            {
                GBuffer output;
                output.albedo = float4(1.0f, 0.0f, 0.0f, 1.0f);
                return output;
            }
        "
    }]
}


This is the most simple scenario, the cube mesh is directly rendered to the swapchain back buffer. The only thing really worth noting here is the use_vertex_3d tag set to true, this is because the vertex input is currently defined in the render pass, and is assumed to be a 2d vertex (since you’ll be drawing 2d screen quads 90% of the time). Of course, this example is not enough to cover the more advanced techniques such as offscreen rendering, blending, uniform buffers, custom camera. (You can view the sky object here, the sky shader here, and the camera object here)

Shader Conversion:

The shader is first wrote in HLSL and saved in a json file organized per stages. Then I use XShaderCompiler to convert the shader into GLSL:

std::string HLSLToGLSL(const std::string& input, orb::Shader::Stage stage)
{
    auto StageToTarget = std::map<orb::Shader::Stage, Xsc::ShaderTarget>() =
    {
        { orb::Shader::eUndefined      , Xsc::ShaderTarget::Undefined                    },
        { orb::Shader::eVertex         , Xsc::ShaderTarget::VertexShader                 },
        { orb::Shader::eTessControl    , Xsc::ShaderTarget::TessellationControlShader    },
        { orb::Shader::eTessEvaluation , Xsc::ShaderTarget::TessellationEvaluationShader },
        { orb::Shader::eGeometry       , Xsc::ShaderTarget::GeometryShader               },
        { orb::Shader::eFragment       , Xsc::ShaderTarget::FragmentShader               },
        { orb::Shader::eCompute        , Xsc::ShaderTarget::ComputeShader                }
    };

    auto inputStream = std::make_shared(input);
    std::ostringstream outputStream;

    Xsc::ShaderInput inputDesc;
    inputDesc.sourceCode = inputStream;
    inputDesc.shaderVersion = Xsc::InputShaderVersion::HLSL5;
    inputDesc.shaderTarget = StageToTarget[stage];
    inputDesc.entryPoint = "main";

    Xsc::ShaderOutput outputDesc;
    outputDesc.sourceCode = &outputStream;
    outputDesc.shaderVersion = Xsc::OutputShaderVersion::GLSL450;
    outputDesc.options.autoBinding = true;
    outputDesc.options.optimize = true;
    std::string output = "";

    try
    {
        if (Xsc::CompileShader(inputDesc, outputDesc)) {
            output = outputStream.str();
        }
    }
    catch (const std::exception& e)
    {
        throw Exception(e.what());
    }

    return output;
}


And I convert the GLSL into SPIR-V binary using shaderc:

std::string GLSLToSPIRV(const std::string& input, orb::Shader::Stage stage)
{
    auto StageToKind = std::map<orb::Shader::Stage, shaderc_shader_kind>() =
    {
        { orb::Shader::eUndefined      , shaderc_glsl_infer_from_source      },
        { orb::Shader::eVertex         , shaderc_glsl_vertex_shader          },
        { orb::Shader::eTessControl    , shaderc_glsl_tess_control_shader    },
        { orb::Shader::eTessEvaluation , shaderc_glsl_tess_evaluation_shader },
        { orb::Shader::eGeometry       , shaderc_glsl_geometry_shader        },
        { orb::Shader::eFragment       , shaderc_glsl_fragment_shader        },
        { orb::Shader::eCompute        , shaderc_glsl_compute_shader         }
    };

    shaderc::CompileOptions options;
    options.SetOptimizationLevel(shaderc_optimization_level_size);
    options.SetSourceLanguage(shaderc_source_language_glsl);
    shaderc::Compiler compiler;

    auto res = compiler.CompileGlslToSpv(input, StageToKind[stage], "test", options);
    if (res.GetCompilationStatus() != shaderc_compilation_status_success)
    {
        throw Exception(res.GetErrorMessage());
    }

    return std::string(
        reinterpret_cast<const char*>(res.cbegin()),
        reinterpret_cast<const char*>(res.cend())
    );
}


This process is very slow in Debug (up to a second per shader) since both libraries are quite large. However in Release it takes around 50ms, which is much more acceptable. The size of the dependencies is also the reason why ShaderConverter is split into it’s own ~5mb dll.

Builds:

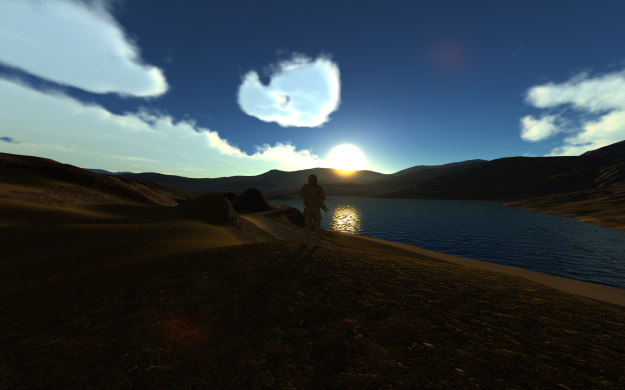
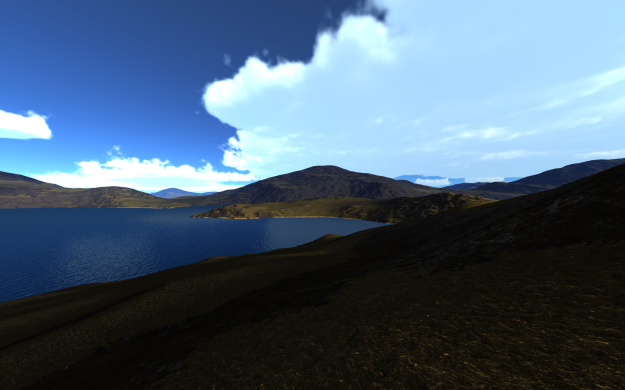
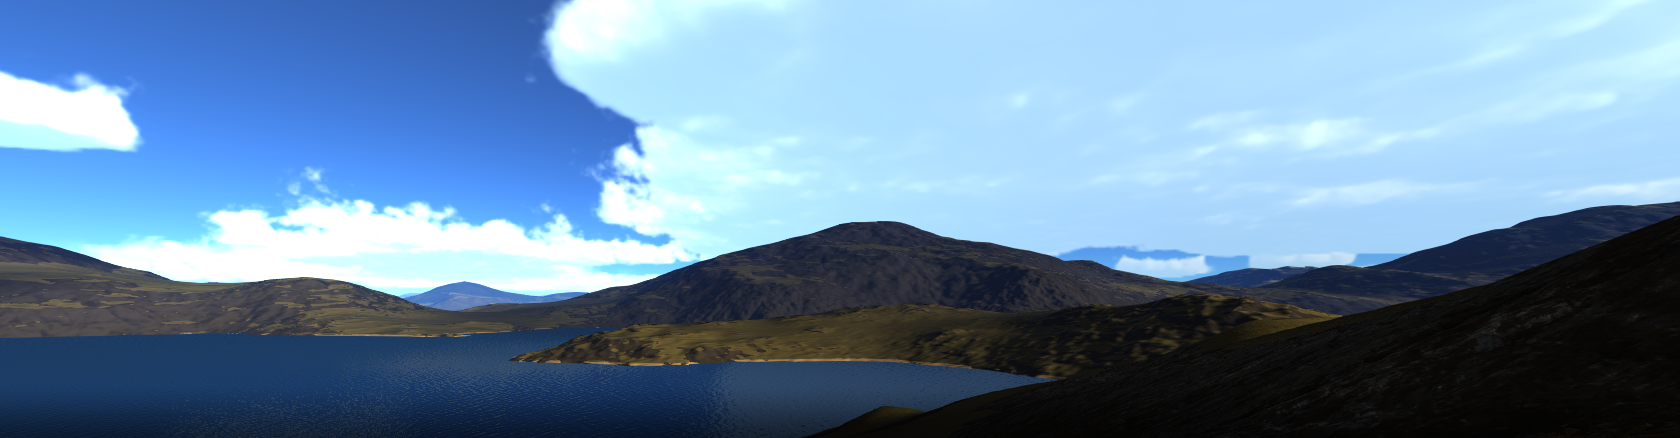
I’ve joined a build of the current state of the project displaying a light scattering pass blended with a GUI pass. Keep in mind that this requires Microsoft Visual C++ 2017 Redistributable, and has only been tested on Win10 with a NVIDIA 970 GTX. (Drag into folder and run Sky.exe. The default renderer is Vulkan, but you can change it to Dx3D12 in the client.lua file)

Conclusion:

I think it’s fair to say that there’s a steep learning curve for both APIs, you’ll be writing much more code to get things working the first time. But when everything is properly abstracted away, that’s when they really start to shine. I think both Khronos and Microsoft did a very solid job with this generation, and hopefully more devs will take the leap.

References:

[1] Advanced WebGL – Part 2: Sky Rendering

Modern Planet Rendering : Networking, Roads and Particles

It’s always good practice to implement the networking part of a project early on, this way you can design the other components around it, thus avoiding some major refactoring in the later stages of development. This article covers how I implemented networking in a planet renderer, and the difficulties I faced during the process. I also talk about road rendering using a vectorial graph system, skeleton based animation using the ozz animation library and finally a particle system using OpenGL’s transform feedback.

Networking:

Network programming is a very challenging field, the idea that the information relayed between a server and a client takes a certain amount of time to reach it’s destination, if it ever reaches it, makes any trivial implementation suddenly much more complex. Most modern games find clever ways to give the player the illusion that everything occurs in real-time. On the server-side we usually try to predict the client actions using techniques such as dead reckoning, while on the client-side, we simultaneously perform the action and send the message to the server, correcting the result based on the given response. These approaches solve most of the issues that can be predicted and corrected, but some systems simply can’t be truly synchronized across a network, the major one being dynamic physics simulation. The reason is actually quite simple, if a desynchronization occurs between the server and a client, it’s impossible to correct the dynamic simulation while it’s still happening, at least as far as I’m aware. It would actually be possible to work around this by performing the simulation on each connected clients, but we are limited by the fact that the results would vary due to some precision issues that usually occurs across different machines (Unless we are using a deterministic physics engine).

Replica System:

In some cases, it really helps to build an architecture around a simple concept, the replica system is built around the idea that a class should be replicated on both the server and the client, and should be synchronized in a continuous way based on a fixed interval. Since I don’t know a whole lot about low-level networking, I used RakNet‘s ReplicaManager3 implementation, it allowed me to start with an already optimized base, meaning I could concentrate more on how to do the actual implementation. The main challenge was to make the core framework side completely versatile, allowing as much freedom on the scripting side as possible. (You can view the client script here, the server script here, the object_base script here and the player script here)

Here’s a simple usage breakdown:

  • The server creates a network object, and waits for incoming connections.

class 'server' (sf.Window)

function server:__init(w, h, title, style)
    sf.Window.__init(self, sf.VideoMode(w, h), title, style, sf.ContextSettings(0, 0, 0))

    -- create server network object
    self.network_ = root.Network(root.Network.SERVER_TO_CLIENT)
    self.network_:set_auto_serialize_interval(100)

    -- signal called when network is ready
    root.connect(self.network_.on_connect, function()

        -- we create the shared planet data here
        self.planet_ = planet("sandbox/untitled_planet.json")
    end)

    -- signal called on object creation request
    root.connect(self.network_.on_request, function(bs, network_id)

        local type_id = bs:read_integer()
        local object = nil

        if type_id == ID_PLAYER_OBJECT then

            object = player(self.planet_)
            object:on_network_start(self.network_) -- replica created here
        end

        -- reference object creation here
        return object.replica_
    end)

    -- on_connect is called when ready
    self.network_:connect("localhost", 5000)
end


  • The client creates a network object, connects to it, and sends a player creation request to the server.

class 'client' (sf.Window)

function client:__init(w, h, title, style)
    sf.Window.__init(self, sf.VideoMode(w, h), title, style, sf.ContextSettings(0, 0, 0))
    self.active_player_ = nil
    self.player_id_ = 0

    -- create client network object
    self.network_ = root.Network(root.Network.CLIENT_TO_SERVER)

    -- signal called when connected to server
    root.connect(self.network_.on_connect, function()

        -- we create the shared planet data here
        self.planet_ = planet("sandbox/untitled_planet.json", true)

        local bs = root.BitStream()
        bs:write_integer(ID_PLAYER_OBJECT)

        -- send player creation request, return requested network id
        self.player_id_ = self.network_:request(bs)
    end)

    -- signal called on object creation request (after reference from server)
    root.connect(self.network_.on_request, function(bs, network_id)

        local type_id = bs:read_integer()
        local object = nil

        if type_id == ID_PLAYER_OBJECT then

            object = player(self.planet_)
            object:on_network_start(self.network_) -- replica created here

            if self.player_id_ == network_id then
                self.active_player_ = object
            end
        end

        return object.replica_
    end)

    -- on_connect is called when connected to server
    self.network_:connect("localhost", 5000)
end


  • The server receives the creation request, creates the object, assigns the requested network id and replicate it across the connected clients. Let’s take a look at what a replica implementation looks like.

class 'object_base_net' (root.NetObject)

function object_base_net:__init(network, object)
    root.NetObject.__init(self, network)
    self.type = root.ScriptObject.Dynamic
    self.object_ = object

    if not network.autoritative then
        self.history_ = root.TransformHistory(10, 1000)
    end
end

function object_base_net:__write_allocation_id(connection, bs)

    root.NetObject.__write_allocation_id(self, connection, bs) -- call first
    bs:write_integer(self.object_.type_id_)
end

function object_base_net:__serialize_construction(bs, connection)

    bs:write_vec3(self.object_.transform_.position)
    bs:write_quat(self.object_.transform_.rotation)
    root.NetObject.__serialize_construction(self, bs, connection)
end

function object_base_net:__deserialize_construction(bs, connection)

    self.object_.transform_.position = bs:read_vec3()
    self.object_.transform_.rotation = bs:read_quat()
    return root.NetObject.__deserialize_construction(self, bs, connection)
end

function object_base_net:__serialize(parameters)

    parameters:get_bitstream(0):write_vec3(self.object_.transform_.position)
    parameters:get_bitstream(0):write_quat(self.object_.transform_.rotation)
    return root.Network.BROADCAST_IDENTICALLY
end

function object_base_net:__deserialize(parameters)

    self.object_.transform_.position = parameters:get_bitstream(0):read_vec3()
    self.object_.transform_.rotation = parameters:get_bitstream(0):read_quat()
    self.history_:write(self.object_.transform_)
end

function object_base_net:__update(dt)

    if not self.network.autoritative then
        self.history_:read(self.object_.transform_, self.network.auto_serialize_interval)
    end
end


  • When the object creation request is received on the client-side, we create the object, check if the network id matches the requested one, if it does we assign it as the active player. We now have a replicated object shared across the network.

Vectorial and Residual Data (WIP):

Although it’s possible to generate very realistic and detailed terrain using all sorts of different algorithms, a real life terrain differs a lot from just its own elevation data. It is made out of several kinds of area that each follows their own specific set of rules, a field or a city is generally more flat, a road will flatten the terrain surrounding it, a river will only flow downhill, and so on. In order to accurately represent those elements, we can use the concept of a Graph, holding all this information in the form of vectorial data. Per instance, a simple road can be represented by a curve, linked by two control nodes. In order to apply this road on a terrain, we use the concept of a GraphLayer, since a road affects both the elevation and the color of the terrain, we make use of two different GraphLayer, both are using the same Graph, but are drawn differently. I’m still in the process of understanding how it all works, I will post a more detailed explanation in a future post, for now I only managed to get a simple road with a fixed height working.

Residual data is what allows a the terrain to be deformed, it is the elevation difference between a generated tile and the modified values. It is useful to manually adjust the terrain where needed, but can also be extended to support various types of tools such as a heightmap brush that can print a generated heightmap from other software such as World Machine or L3DT, a noise tool that can apply certain type of noise on top of the generated one, a flatten tool that can equalize the surrounding elevation, and so on. (You can view the planet_producer script here and the road_graph_layers script here)

screenshot

Skeleton Based Animation (WIP):

I’ve been meaning to implement skeleton based animation for a while now. I used the Assimp library in the past but the loading time where less than ideal for a streaming solution. After looking around for other implementations, I found the ozz-animation library. It’s worth saying that this is not a drop-in solution and will not work out of the box, however once you take the time to write an implementation that fits your needs, it becomes by far the most complete solution out there. It performs the skinning job on the CPU, which is exactly what I need since I already use the GPU quite extensively, and it also allows the process to be done on a seperate thread. Additionally, it comes with a set of command line based tools that will convert a FBX animation to it’s custom binary based archive format, making the loading process very fast. I spent a couple of days learning a basic animation making workflow, and let’s just say I’ve gained a whole lot of respect for all the animators out there. (You can view the player script here)

References:

[1] Source Multiplayer Networking
[2] Real-time rendering and editing of vector-based terrains
[3] Particle System using Transform Feedback

Modern Planet Rendering : Physically Based Rendering

For the last few weeks I’ve been working on ways to get realistic shading in an environement as large as a planet while maintaining as much details in the near view as possible. In order to achieve this, I use Physically Based Rendering (PBR) for the light shading model, and combine it with the values supplied by the precomputed atmosphere. Additionally, a global/local volumetric environement probe system is used to seamlessly provide information for Image Based Lighting (IBL) in real time.

Volumetric Deferred Lights:

When using forward rendering, the shading cost is usually related the number of lights present in the scene. In constrast, when using deferred rendering, the shading cost is shifted to the rendering resolution, since we now store the vertex data in textures. For most operations in deferred rendering, a screen quad mesh is used to process a texture, this make sure that every pixels in the screen is processed. In order to reduce the shading cost, it’s possible to draw basic shapes instead of a screen quad, and use projective mapping to perform the textures lookup instead. (You can view the PBR common shader here, and the point light shader here)

This would be a regular deferred pass using a screen quad.

-- vertex shader
layout(location = 0) in vec2 vs_Position;
layout(location = 1) in vec2 vs_TexCoord;
out vec2 fs_TexCoord;

void main()
{
    gl_Position = vec4(vs_Position, 0, 1);
    fs_TexCoord = vs_TexCoord;
}

-- fragment shader
layout(location = 0) out vec4 frag;
in vec2 fs_TexCoord;

void main()
{
    float depth = texture(s_Tex0, fs_TexCoord).r;
    vec4 albedo = texture(s_Tex1, fs_TexCoord);

    vec3 wpos = GetWorldPos(fs_TexCoord, depth);
    frag = vec4(albedo.rgb, 1);
}


And this would be a deferred volumetric pass using a cube mesh.

-- vertex shader
layout(location = 0) in vec3 vs_Position;
out vec3 fs_ProjCoord;

void main()
{ 
    gl_Position = u_ViewProjMatrix * u_ModelMatrix * vec4(vs_Position.xyz, 1);
    fs_ProjCoord.x = (gl_Position.x + gl_Position.w) * 0.5;
    fs_ProjCoord.y = (gl_Position.y + gl_Position.w) * 0.5;
    fs_ProjCoord.z = gl_Position.w;
}

-- fragment shader
layout(location = 0) out vec4 frag;
in vec3 fs_ProjCoord;

void main()
{
    float depth = textureProj(s_Tex0, fs_ProjCoord).r;
    vec4 albedo = textureProj(s_Tex1, fs_ProjCoord);

    vec2 uv = fs_ProjCoord.xy / fs_ProjCoord.z; 
    vec3 wpos = GetWorldPos(uv, depth);
    frag = vec4(albedo.rgb, 1);
}

Volumetric Environement Probes:

For this approach, the environement probes are treated as another type of light, just like a point, a spot or an area light. It consist of two parts, a global cubemap, and a list of smaller parallax corrected cubemaps. The global cubemap is generated first and contains the sky, sun and clouds lighting information. Next I generate the local cubemaps, but change the clear color to transparent so that they can be blended later on, at this point all the information is generated and ready to be drawn. For the actual drawing, I use a screen quad volume for the global cubemap, and a box volume for the local cubemaps. First I clear all the buffers and draw the local volumes, then I draw the global volume while making sure to skip the pixels already shaded using a stencil buffer. This works but the local cubemaps still shades pixel outside of it’s range, to fix this I discard the pixel if the reconstructed world position is outside of the volume range. Finally, in the local volume passes, I blend the local cubemap with the global one using it’s alpha channel. (You can view the render pipeline object here,  the envprobe script object here, and the envprobe shader here)

Procedural Terrain Shading:

Now that the IBL information is ready, it’s time to actually shade the terrain. First I generate a splatmap using information such as the terrain slope and range. The detail color and normal textures are loaded from memory and stored in texture arrays. To improve the quality, they are mipmapped and use anisotropic and linear filtering. Several different techniques are used to shade the terrain such as normal mapping, height and distance based blending and Parallax Occlusion Mapping (POM) for the rocks. (You can view the tile producer script object here, the splatmap shader here, the planet script object here, and the planet shader here)

hq2

Tessellation:

While the planet is still using a quadtree for the tile generation and such, tessellation is now used for the actual mesh rendering. This is needed to boost the amount of polygons close to the player camera, and fixes some collision mismatch I had when generating the tile colliders. It’s also very useful to control the terrain quality based on the GPU capabilities. (You can view the planet shader here)

Conclusion:

I also did a lot of work around model loading, I’m using the gltf pipeline to generate binary models, and added the abilities to create collider directly from the vertices/indices buffer, meaning it’s now possible to stream large models as they load almost instantly.

hq3

References:

[1] Encelo’s Blog (Volumetric Lights)
[2] Cinder-Experiments (Parallax Corrected Cubemap)
[3] Asylum_Tutorials (Physically Based Rendering)
[4] Proland (Planet Rendering)

Modern Planet Rendering : Reflections, Object Picking and Serialization

One of the most widely used technique to render photorealistic scenes in a game nowadays is PBR. While it’s implementation varies from one engine to another, it’s common practice to use a reflection buffer to represent the surrounding environment. In my last post I talked about some of the issues I had with SSLR and how it introduced many artifacts related to what is not visible on the screen, following this I experimented with regular planar reflections but hit a roadblock when it comes to actually blending the reflection with the gbuffer normals in a deferred setup. I have worked with Marmoset in the past, and I really liked their hierarchical approach to cubemap based reflections, how they use a global cubemap to represent the environment and smaller parallax corrected cubemaps for local reflections, so I tried this approach. Turns out “crafting” your reflection buffer this way really gives you the best results, and is actually very cheap with proper optimization.

Reflections:

For the scope of this post, I’ll cover only the global cubemap. For starter, I had to figure out where to place this cubemap, usually you’d want to place it in the middle of a scene slightly higher on the y axis. In my case I get the center of the closest sector bounding box and add a fixed value on the y axis. The best way to handle this would be to cast a ray down the y axis and get the actual terrain height at this point, but for now it works just fine. Now to render the actual cubemap, I first perform a very cheap cloud pass with a low max iterations value, then I perform the sky pass using the already generated athmosphere textures and.. that’s it really, there’s already enough information to provide a decent global reflection to the scene. The important part is the optimization, first we need to render at a very low resolution, something like 24×24 with linear filtering should be enough. The really crucial part is to render only one cubemap face per frame, this’ll of course make the reflection a little more laggy but it wont be noticable when the environment changes slowly. Finally, there’s no need for the negative y face, it’s almost always black, unless you’re very particular about the color of the reflected ground.

reflection_hq

Object Picking:

I also worked on the editor a bit, I fleshed out the sector view so that it now shares one perspective view and three orthographic views of the scene in a cross splitter setup. To make editing sectors easier, the terrains in those views are not spherical. I also added a grid for the ortho views and a shared manipulator used to transform the selected objects. The actual selection was the biggest challenge, in the past I used to project the mouse position using the gbuffer depth and check if it was inside a slightly enlarged bounding box of an object, it worked pretty well since I was using a more scene graph oriented design, meaning I was traversing a tree instead of a list, usually finishing the traversal with the smaller objects. In this project I choosed to handle the objects in a non hierarchical manner, mainly because I think that the whole parent/child approach should be used either on the asset creation stage or should be object specific, since it usually gets in the way when it’s not needed. I went with the more regular color based picking approach, the drawback is that it requires an additional color buffer and draw pass, but it can be overcome by performing the picking pass only when the mouse button is clicked. I also added multiple objects picking support by extracting all the colors found inside a given rect when the mouse is released.

editor_cross

Serialization:

Since I need to start placing smaller cubemaps in a scene, I needed to imlement the core of a serialization system. The process is pretty vanilla, I’m exposing picojson to the scripting side basically. Serializable objects have both a parse/write virtual that can be overload to write information specific to them. The serialization is done on the scripting side and it’s completly up to the user to define how it’s going to be done, this way you could implement a more ECS based approach to a project if you needed to. The parse/write approach is meant to be expended with RakNet’s ReplicaManager3 plugin, allowing serialized objects to be replicated across a network, but this’ll be covered in another post.

function object:parse(config)

    self.transform_.position.x = config:get_number("pos_x")
    self.transform_.position.y = config:get_number("pos_y")
    self.transform_.position.z = config:get_number("pos_z")
 
    self.transform_.scale.x = config:get_number("scale_x")
    self.transform_.scale.y = config:get_number("scale_y")
    self.transform_.scale.z = config:get_number("scale_z")
end

function object:write(config)

    config:set_number("pos_x", self.transform_.position.x)
    config:set_number("pos_y", self.transform_.position.y)
    config:set_number("pos_z", self.transform_.position.z)
 
    config:set_number("scale_x", self.transform_.scale.x)
    config:set_number("scale_y", self.transform_.scale.y)
    config:set_number("scale_z", self.transform_.scale.z)
end

Conclusion:

I also implemented rigid body picking since it was using the same kinda math. You should expect to see more visually pleasing results pretty soon, having a decent reflection was the only thing preventing me from implementing PBR, and eventually procedural terrain shading, right now the color values are all over the place.

Modern Planet Rendering : Editor, Physics and Clouds

It’s been a few weeks since I last posted about this project, I tought I’d write a quick update to share some of the progress and difficulties I’ve had so far. One of the major challenge that quickly became apparent was how to edit a scene in a planet with such a large radius. When you think about it, you could add millions of object scattered around randomly on a planet and still have hard time locating even one, the scale is just that big. The usual solution to this is to procedurally place the objects as you are generating/moving around the planet, but I did not want to rely on procedural content when it comes to actual scene editing, this should really be done by an artist. Another restriction I had was that, in order to avoid precision artifacts, I need to draw the smaller objects using a camera from the center of the world (x, y, z), and then copy this camera and offset it (x, y + r, z) to draw the planet, kinda like a local coordinate system based on an offset vec3. And the final restriction was that you simply can’t iterate trough millions of objects in a standard container such as a standard vector.

Sector Paging System:

The first part of the solution was to use the concept of a sector to represent the root of a scene at an arbitrary offset point on the planet, this way all the camera offsetting stuff are abstracted away in this object. Now for the second part of the solution, I had already done some experiments with using a kdtree to handle large scene in the past and actually got some very decent results, the drawback was that doing a radius search based on the camera position every frame was brutal on the CPU. To fix this, I can now register a callback whenever a new tile is created during the culling traversal of the planet, when the tile level is equal to (max_level – 2), I use the bounding box of this new tile to get the center and perform a radius search around this point, this reduce the overhead to almost zero, even when having millions of sector indexed.

self.faces_[i] = root.Terrain(radius, max_level, i - 1)
 root.connect(self.faces_[i].on_page_in, function(tile)
 
     if tile.level == max_level - 2 then
         local deformed_center = tile.owner:get_face_matrix() * tile.owner:get_deformation():local_to_deformed(tile:get_center())
         self.active_sectors_ = {}
 
         local matches = self.sectors_point_cloud_:radius_search(deformed_center * self.sectors_point_cloud_scale_, 0.01) 
         for i = 1, table.getn(matches) do
             self.active_sectors_[i] = self.loaded_sectors_[matches[i]]
             self.active_sectors_[i]:page_in()
         end
     end
 end)


Editor:

To implement the editor, I simply added a new script that instantiate an editor object when allocated. When starting the framework, you can choose to define the scripting entry point, by default it’ll search for the file client.lua, but if you pass a script path in the arguments, it’ll start with this script instead. It’s then possible to load/reload/unload the client script from the editor to quickly drop in game and test things out. I used GWEN for the GUI and wrote a custom renderer based on a SpriteBatch, I also used fontstash for the text rendering. One of the neat features that GWEN offers is the ability to redraw the GUI only when it’s modified, this allows you to draw into a texture by using a framebuffer, drastically improving the performance. Since we now have two entry points, there’s some scripts that’ll be shared between the sub-applications, those are now located in the shared folder.

editor

Physics:

For now the physics are done on the client side since the network is not implemented yet, but it’ll eventually be cloned in a server sub-application in order to have a fully authoritative server. I’m using Bullet 2.85 built with the BT_USE_DOUBLE_PRECISION preprocessor. To create a tile collider, I again use the new tile callback described above, but this time I check for tiles with the max level, I then read back the height value from the GPU and use the planet’s deformation class to create a spherical btTriangleMesh. For the player I’m using a regular btKinematicCharacterController, but I’m planning on using a spring system to handle the slope better.

Clouds:

For the clouds, I ported kode80’s volumetric clouds to glsl and wrote the planet_clouds.h script object to implement it. The clouds are drawn during the post processing stage and are applied during the sky pass so that they can be properly blended with the atmosphere. I also blend the clouds coverage shadow with the sun shadow for even more realism. It’s a very heavy shader, so I had to downsample and reduce the number of iteration from 128 to 80 in order to keep a stable >120 FPS on my 970, so it can look much better if you have the right GPU.

clouds_hq

Conclusion:

There’s a lot I did not cover in this post, I spent a lot of time trying to get SSLR working but in the end I decided to drop it entirely, because let’s be honnest, the fact that you can only reflect what’s visible on the screen introduces way too much artifacts, and does not outweigh the visual gain. I really liked the idea of Cone Tracing in order to reduce the artifacts, but while it looks awesome in box-shaped area, it did not work really well with distance. I know that games such as the latest Doom uses SSLR combined with cubemaps (or maybe environment probes? not sure) as a fallback, but I think it only really works in more enclosed space where it’s possible to use technique such as parallax corrected cubemap. The next available option is to render the scene flipped on a plane, but the way I render a planet makes this really hard to achieve. I also did some work to allow script and shader dynamic hot-swapping, this’ll be very useful because the next step is proper BRDF.

Modern Planet Rendering

The art of rendering planets has always been a very fascinating aspect of graphics programming, mostly due to the fact that it offers an impressive sense of scale to the player, but also because it pushes the developers to think of new ways to workaround the hardware limitations that comes with objects that exceeds the limit of a floating point. From games such as Spore, Kerbal Space Program or the more recent No Man’s Sky and Star Citizen, we have learned that, although it won’t warrant a good game, planet rendering offers many technical and gameplay related advantages, some more obvious than others.

https://gfycat.com/EqualSmugAmethystgemclam

Advantages of Planet Rendering:

  1. Natural Horizon Culling:

    The shape of a planet makes it convenient to hide tiles that are below the horizon line, without having to resort to artificial distance based fog.

  2. More Accurate Lighting:

    This one is more related to the atmoshere than the planet itself, but having access to precomputed transmittance/irradiance/inscatter textures during the lighting stage is very useful to get an accurate lighting model, at least for the first bounce.

  3. Large Procedural Scene:

    Using procedural data as the base for a scene allows you to free a lot of storage space that could be used for more important data. I think it’s faire to say that using only procedural content can get old very fast, but it’s possible to combine procedural and lower resolution residual data in order to acheive a scene made by an artist (or generated with other external programs such as World Machine or L3DT) at a very low cost.

Framework:

I started this project mainly to build a framework along side with it, the reason being that planet rendering exposes a lot of edge cases that could not be encountered otherwise. The framework is made in C++ and uses both LuaJIT and luabind (deboostified) for scripting. The core idea is to create all the generic components needed in an engine on the C++ side and then expose them in Lua so that we can seperate all the game logic into a compressed archive, in the same vein as Love2D. It’s basicaly a single Lua context on steroid.

Scripting:

The first thing called by the framework is an entry script located at the root of the project, this script then creates ScriptObjects that can optionally be tagged as dynamic. A dynamic ScriptObject is updated by the framework and allows you to perform update/rendering calls. For this project, the only aspect implemented in the framework is the terrain class since it’s generic and can be used in other context, everything else is implemented in Lua.

Atmosphere/Planet/Ocean Rendering:

After searching around for a while I found that the most elegant open source approach is by far Proland. It offers many advantages such as having a Deformation class that can be applied to a specific terrain, this allows all the code related to planet rendering to be backward compatible with a regular planar terrain approach.

Deferred Rendering:

One of the big challenge to make this approach ready for modern games was to change the rendering type from forward to deferred, this requires a couple of small tricks in order to acheive acceptable results. The firt step is to render the depth, color and normals into a gbuffer, and process the lighting in a post process pass. In order to properly apply the atmosphere lighting I had to rebuild the word space position from the depth buffer. Since the actual camera position exceeds the floating point precision, I rebuild the position using a view matrix that is not translated and add the translation after. The main difficulty I encountered was that now that the position were rebuilt from the depth buffer, I had major precision artifacts in the far view. In order to fix this I split the view frustum into two parts, the near view uses deferred rendering, and the far view uses forward rendering, this way the objects inside the near view have the lighting applied to them without having to modify their original shaders. I expected a major seam artifact at the split location but suprisingly it’s not even visible, meaning that the information rebuilt in the deferred stage is accurate.

deferred

Cascaded Shadow Mapping:

At first I tried to implement VSM but unfortunately, the performance I got were actually worse than regular PCF. So in the end I went with Deferred Cascaded PCF Shadow Mapping, I also finally got the shadows to stop flickering when moving by rounding the shadow projection matrix in texel space, a very small but effective tweak.

local rounded_origin = math.round(origin)
local round_offset = (rounded_origin - origin) * (2.0 / self.resolution_)
round_offset.z = 0.0
round_offset.w = 0.0	
sun_proj:set(3, sun_proj:get(3) + round_offset)


https://gfycat.com/CloudyAffectionateDinosaur

Ambient Occlusion:

I implemented HBAO, and combined with a bilateral blur you get a very decent ambient occlusion approximation.

occlusion

Pseudo Lens Flare:

John Chapman framework code is another base I used, mainly for the camera code and the HDR post processing. This effect coupled with motion blur really gives you the feeling that you are seeing the world trough a camera lens, and it’s actually a good thing in a context where you are seeing the world trough a screen. This effect is generated and then applied at the very end of post processing.

https://gfycat.com/RecentAgedElk

Subpixel Morphological Antialiasing:

Not much to say here, you input a render texture and get a antialiased output.

Conclusion:

If you are further interested in planet rendering I would strongly recommend taking a look at Proland publications page, Outerra blog, and Making Worlds by Steven Wittens. I included the scripting side code, keep in mind that this code is in no way release ready nor properly commented, just some work in progress.

OpenGL 4.0 Planet Rendering using Tessellation

Description:

This project is based on the article Making Worlds by Steven Wittens, I recommend reading it first if you’re interested in planet rendering. The two main differences with this approach is that it’s not procedural but rather data based, and that it’s using tessellation instead of quadtree for LODing.

cubemap
This image shows how you can use a normalized cube to make a sphere.

For the tessellation, I simply adapted Florian Boesch’s OpenGL 4 Tessellation to work with a cubic heightmap. It worked pretty much out of the box and allowed the culling to be performed on the GPU. The heightmap is generated in World Machine using a 2:1 width-to-height ratio, I then open it in Photoshop to apply some panoramic transformations. The whole process is described here. At first I was using HDRShop 1.0.3 just like in the tutorial but was only able to output the result as a RGB32 image. This loss of precision resulted in some rather nasty stepping artifacts when mapped on a terrain. I then moved to Flexify 2 and was able to output a proper 16bit greyscale image.

result
This image shows the final result before being split into tiles.

Known Bugs:

  • Visible seams at the edge of the tiles, I’ll definitely fix this at some point.
  • Patches can be culled out when the camera is too near and perpendicular to the terrain, this is related to the view frustum shape.

Tools Used:

Libs Used:

Source:

Builds:

Media:

terrain2 terrain1 terrain3

Streaming Large World Using KdTree

Implementation:

This implementation is using the Composite/Visitor Pattern (based on OpenSceneGraph). In order to get descent performance on large scene I had to figure out a way to retrive the nodes closer to the player without having to do a entire scene traversal. I found a solution using kdtree, it goes like this:

  1. When loading the scene, add the position of the nodes that are higher in the scene hierarchy in a kdtree index.
  2. When the scene is loaded, build the kdtree index.
  3. Before traversing the scene, perform a nearest neighbor search based on the player position and build a temporary node holding the result.
  4. Perform the culling stage (CullingVisitor for those familiar with OSG) on the result.
  5. Finally render the scene.

I also split the scene into areas, each holding it’s own kdtree. This way it’s possible to do a quick distance check before doing the actual nearest neighbor search on a area.

Result:

When building a scene you can specify the number of area on the x/z axis and a resolution. To test things out, I made a 8×8 scene with a resolution of 4096, each area holds 8000 “parent” node that each holds 4 children node, giving us a total of 4096000 nodes. The scene is running at an average of ~550 FPS when disabling the actual rendering calls. Right now there’s no frustum culling and I’m rendering the cube using deprecated opengl so I’m getting around ~260 FPS with rendering, it should improve later on). This approach is mostly CPU bound and searching with a radius too large can drastically decrease performance so I’m thinking of holding the nodes that can be seen from far away (a terrain per instance) in a different group in order to keep a far view. Also I’m currently using alpha blending as a fog to avoid nodes popping on the screen. Here’s the result:

Media: